Tuesday, April 30, 2013

Potsticker Perfection


This weekend was international house of food at my house! Saturday I celebrated all things Chinese with homemade potstickers and Chinese noodle soup, while Sunday I celebrated Mexican by making homemade Beef and Shrimp Fajitas! So we traveled far this weekend, well our taste buds did anyway. And I am going to share all these lovely little recipes with you! I know, I'm nice right?! Well don't tell anybody. 

So here's the deal with these potstickers.....

Potstickers

2 Chicken Breasts, small dice
1 1/2 tsp. Season Salt
1 1/2 tsp. Ginger (powdered)
1 Garlic Cloves, minced
1/4 tsp. Ground Mustard
1 tsp. Garlic Powder
1 Tbsp. Worcestershire 
1 Tbsp. Soy Sauce
2 Tbsp. Canola Oil

3/4 Cup Carrots, shredded
3/4 Cup Cabbage, shredded
Wonton Wrappers

2 Tbsp. Oil for frying

In a large skillet heat canola oil over medium heat. Once the oil is hot add chicken and all the seasonings, and cook until the chicken starts to turn white. Then add the Worcestershire and soy sauce and continue to cook until the chicken is fully cooked. The chicken will be white in the middle or an internal temperature of 165 degrees. Then add in the shredded carrots and cabbage, saute for another minute and then remove from the heat. 

Fill a large pan with water, just like you are going to boil pasta, and bring to a boil. Fill a small bowl with water and set near your potsticker assembly station. Spoon about a tablespoon of the mixture in the middle of a wonton wrapper, dip your finger in the water and run your finger around all four outer edges of the wrapper. Then fold in half like a triangle and crimp closed. Repeat about 100 times....okay so not quite 100 but it will feel like it by the time you are done. I made 24 before I gave up and we all grubbed on the leftover mix. Once the potstickers are done, place about 6 in the boiling water and cook for about 2 minutes. Remove from the water and place aside. Continue until all the potstickers have been boiled. At this point you can eat them, but I like mine crunchy, so I pan fry them. In the skillet you saute'd the chicken, place 2 Tbsp. canola oil, place about 8 potstickers in the pan, if you can, and cook until the side is golden brown, then turn on another side and cook until it is golden brown. Repeat until all sides are golden brown. Remove from the pan and place on some paper towels. Repeat until all the potstickers are fried. 

They should look something like this.....

Don't they look yummy??? Well they are and now you get to do the fun part, EAT THEM!!! Enjoy! 

Monday, April 29, 2013

Toffee Crunch Cheesecake


This weekend, I was a baking and cooking fool! Just one of the things I made this weekend was this little number. Now it has been over 10 years since I have made a cheesecake and it was never something that I really perfected. But after growing into something of a baker I decided to give the elusive cheesecake another try. But as you all know, I don't post recipes on this blog that aren't original to me so naturally I had to create my own cheesecake recipe too. (The real reason I created my own was because I couldn't bear the thought of putting sour cream in my cheesecake).

So here is my version of the cheesecake!

Graham Cracker Crust

Yield: 2 9 inch cakes

16 Graham Crackers, crushed
4 1/2 Tbsp. Granulated Sugar
8 Tbsp. Butter, melted

Preheat oven to 325 degrees. Take two 9 inch round cake pans, grease and coat with powdered sugar. In a medium bowl mix together the above ingredients with your hands. Mixture should feel slightly wet and should clump together. Take mixture and divide it in two. Place half of the mixture in each of the cake pans. Then using your hands press the graham cracker mixture down, until it completely covers the bottom of each cake pan. Place in the oven and bake for 10 minutes, remove from the oven and place to the side.

Toffee Crunch Cheesecake

Yield: 2 9inch cakes

3 8oz. Packages of Cream Cheese (at room temperature)
3 Eggs 
1 Cup Granulated Sugar
1 tsp. Vanilla
1/2 Milka Toffee Crunch Candy Bar, chopped (Can use any candy bar you want)

Preheat oven to 350 degrees. In a stand mixer or in a large mixing bowl with a hand mixer, cream cream cheese. Then add the sugar and cream together until the sugar is incorporated. Scrape the sides of the bowl, add vanilla and one egg, mix thoroughly. Then add another egg, again mixing thoroughly. Scrape the sides of the bowl, add the remaining egg and mix again. Add in candy bar and mix with a rubber spatula. Pour half the mixture over on graham cracker crust and the other half in the other pan. If you want a thick cheesecake just pour the entire batter in one pan. Place in the oven and cook for 35-40 minutes, or until the middle of the cheesecake has set. Remove from the oven and allow to cool completely before eating.

What do you think? Do you like cheesecake?

"Devouring worlds, one book and recipe at a time."

Sunday, April 28, 2013

S'more Cupcakes with Swirled Chocolate Buttercream and Whipped Cream Frosting


Okay, about two weeks ago I promised you a recipe for these beautiful cupcakes right up there, and of course things got crazy and I slacked on my food blogging duty! And I am sorry, as I sit here hanging my head in shame and eating my last S'more cupcake, I want you to know that today I am blogging a bunch of recipes, just for you lovely little people!!

Graham Cracker Crust

Yield: 18 cupcakes

5 Graham Crackers Crushed
4 Tbsp. Butter, melted
2 Tbsp. Granulated Sugar

Heat oven to 325 degrees. In a bowl combine the above ingredients and mix with your hand. The mixture should feel slightly wet and you should be able to clump the mixture together. Then take your cupcake liners and place a small handful of the mixture in the bottom of each liner. Using your fingers, press the mixture down until the bottom of the liner is covered. If you would like you can press some of the mixture up the sides of the liner, but you don't have to. This will add a nice crunch on the bottom of your cupcake. Plus it acts as that graham cracker element! Place in the oven and cook about 8 minutes or until they start to turn a nice golden brown color, remove from the oven and set aside.


S'more Cupcake Recipe

1 Cup Milk chocolate chips
1 Cup Milk + 1 Tbsp. Lemon juice (This will make buttermilk)
1 3/4 Cup Flour
1 tsp. Baking soda
1 Cup Sugar
1/2 tsp. Salt
1/2 tsp. Vanilla
1/4 Cup Vegetable oil
3 Eggs
1 Bag of Large Marshmallows 


Heat oven 325 degrees. In a medium sauce pan melt chocolate and milk mixture and heat over medium heat, until the chocolate is completely melted, whisk together. Remove from heat and allow the mixture to cool. In a large mixing bowl combine flour, baking soda, sugar, and salt. In small bowl combine eggs, and oil. Once the chocolate is cool add a little to the flour mixture and combine. Then add the egg mixture and mix thoroughly. Slowly add chocolate into mixture, mixing thoroughly after each addition. Mixture will be a little runny. Fill liners about 3/4 of the way; I like to use a 1/4 cup measuring cup to fill my liners, bake for 20 minutes, until cupcakes are just about done, then place half a large marshmallow in the middle of each cupcake. Place back in the oven and allow the cupcakes to cook for another 5 minutes. *Note* The marshmallow's will melt into the cupcakes, so don't freak out when you pull the cupcakes out and the marshmallows disappear! Remove from the oven, place on a cooling rack and allow them to cool completely.


Chocolate Buttercream

1 Cup Milk chocolate chips
2 Sticks Butter (salted or unsalted)
1 Cup Butter flavor Crisco
1 tsp. Vanilla
3 1/2 Cups Powdered sugar

In medium saucepan, combine chocolate and 1 stick of butter, place over medium heat and melt chocolate; whisk until butter and chocolate combine. Remove from the heat and allow chocolate to cool completely, you don't want your buttercream to melt! In a large bowl, or in your stand mixer cream together Butter Flavor Crisco and the other stick of butter. Add vanilla and 1/2 cup of powdered sugar and mix on medium speed. Add another 1/2 a cup of powdered sugar and mix thoroughly. Once chocolate is cool pour some chocolate into the creamed mixture and mix together. (Make sure you scrap the bowl before you add the next ingredient). Now continue to add 1/2 a cup of powdered sugar and chocolate until both ingredients have been completely used. Mixture should be thick enough to not fall off a spoon and easy enough to pipe. If the mixture is too soft add another 1/2 cup of powdered sugar. If the mixture is too thick, add 1 Tbsp. of water, until the mixture reaches the desired thickness. Keep in mind that the temperature and humidity in your kitchen will effect the amount of powdered sugar needed to reach your desired thickness.


Whipped Cream Frosting

2 Cups Heavy whipping cream
1/2 Cup Powdered sugar
1 tsp. Vanilla
1 tsp. Cream bouquet emulsion (optional)

Place stainless steel bowl and whisk (beaters) in freezer for 5 minutes. Remove from the freezer and pour in the heavy whipping cream, vanilla and cream bouquet emulsion (if you have it, don't worry if you don't, it can be hard to find), on medium speed whip mixture for about 2 minutes. Then add sugar 1/4 cup at a time. Making sure to whip well after each addition. At this point, taste the mixture, if it is not sweet enough add another 1/4 cup of sugar. Continue to whip mixture until the cream stands up when you remove the beaters.

This is where I cheat. I have piping bags that have two compartments so that I can pipe with two different frosting's at once. I got mine at Hobby Lobby, but I am sure you can find them other places. They come with a special coupler. Fill your bag with both frosting's and then pipe away! But if you don't want to buy the bags, just pick a frosting and go with it! Then top with some crushed graham crackers! (I forgot them for the picture!)


There you go! Eat and enjoy!! Let me know what you think, sound like something you would enjoy???

"Devouring worlds, one book and recipe at a time."

Wednesday, April 17, 2013

Apple Pie Cupcakes with Caramel Buttercream

As you know from my post titled Cupcake Mania I have had a lot of cupcake inspiration lately. And one of my latest inspiration came from apples. Before my little cupcake obsession, probably a year or so ago, I had this obsession with perfecting the apple pie. And when I say obsession, I mean obsession, I am pretty sure I made apple pie every weekend until I felt that I had the recipe just right. So when I see apples I have a tendency to think apple pie! And well nothing quite goes with apple pie like caramel! And considering my cupcakes obsession as of late, when I saw the apples sitting on my table, I immediately jumped to the idea of an apple pie cupcake! 

And let me tell you, that was the best idea I have ever had! Seriously, these were the best cupcakes I have ever eaten, my husband had 5 and tried to convince me to let him eat my childrens! That is how good they are. In fact as I am sitting here typing this blog post I am thinking about the possibility of making them tomorrow.

And now I am going to pass this little recipe to all of you! 


Apple Pie Cupcakes

Yield: 18 Cupcakes

Apple Pie Mix
2 Gala Apples, cored and cubed
1/4 Cup Brown Sugar
2 Tbsp. Corn Starch
1/2 tsp. Salt
1/4 tsp. Vanilla
1/2 tsp. Cinnamon
1/4 tsp. Nutmeg

Cake
1 Pillsbury Classic Yellow Cake Mix
1/2 tsp. Cinnamon
1/8 tsp. Nutmeg
1 Cup Water
3 Eggs
1/4 Cup Flour
1/4 Cup Oil

In a medium sauce pan, combine: apples, brown sugar, corn starch, salt, vanilla, cinnamon, and nutmeg and heat over medium heat, mixing every once in a while. Cook until apples are just fork tender. Remove from heat, set aside and allow to completely cool. In a large mixing bowl combine, cake mix, flour, eggs, water, oil, cinnamon and nutmeg and mix thoroughly. Then add the apple pie mixture and mix it a couple of times. You don't want to mix it too much and smash the apples. Fill cupcake liners a little more than 3/4 of the way, the fruit will prevent it from overflowing. Cook according to directions on the box. Once the cupcakes spring back or a toothpick comes out clean, remove from the oven, place on a cooling rack and allow to cool completely.

Caramel Buttercream

Caramel
1/2 Cup Granulated Sugar
2 Tbsp. Butter
1/2 Cup Heavy Whipping Cream

In medium, heavy sauce pan, heat the sugar over medium heat, until the sugar liquefies. Do not stir, once the sugar turns to liquid swirl the sugar around the pan and cook until the sugar turns a nice amber color. *Warning: this next part can be very dangerous. It is always a good idea to wear oven mitts for the next part. Once the sugar has turned a nice amber color, add in 1 Tbsp. of butter and whisk. Then slowly add in the cream, make sure you lean back from the pan for this, it will be extremely hot! Don't worry, the sugar will solidify, then add the last tablespoon of butter and whisk. Continue to cook, whisking constantly until the sugar has remelted. Remove from heat and allow to cool, completely, otherwise you will melt your buttercream.

Caramel Buttercream
1 Cup Butter or 2 Sticks Butter at room temperature
1 Cup Butter Flavor Crisco (can use regular Crisco if can't find butter flavor)
1/4 tsp. Vanilla
Caramel
~2 1/2 Cups Powdered Sugar

In a large mixing bowl with a hand mixer or in a stand mixer, cream together butter and crsico. Once they have been creamed together add vanilla and 1/2 cup of sugar, mix thoroughly. Then add another 1/2 cup of sugar, mix again. Scrape the side of the bowl  and add a quarter of the caramel, mix thoroughly. Then add another 1/2 cup of powdered sugar and more caramel, mix completely. Continue to do this until the caramel has been incorporated and/or the frosting has reached the desired consistency and flavor. You want a frosting that will not fall off a spoon and one that is soft, if you add too much sugar it get's harder. If the buttercream is not thick enough add more sugar. Remember that the humidity and heat in your house will directly effect the amount of sugar you will need to add to your buttercream. Then add to a large ziploc bag, cut off a small tip and pipe onto your cupcakes! To push these right over the edge of awesome drizzle a little caramel over the top! 

There you have it folks, my favorite cupcakes thus far! Now I dare you to eat just one! 


So, what do you think? Sound like something you might want to try?

"Devouring worlds, one book and recipe at a time."

Monday, April 15, 2013

Peach Mango Cupcakes with Pomegranate Cream Cheese Frosting

As you all know it is cupcake mania here at the blog. I love cupcakes and it seems that lately all my inspiration comes in the form of a new cupcake recipe. But I'm not complaining and neither are my friends and family!

So, what do I have for you today, you ask? Today I offer you this little number.....


And do you know what is so awesome about this cupcake, besides the incredible flavor? The fact that it has actual fruit in it! And because of that you could totally say it is healthy! Well at least that was my excuse as I devoured two of these for breakfast, don't judge me! I like to think that it covers quite a few of the major food groups, you got the cake for grain, the cream cheese for the dairy, and the peach, mango and pomegranate for the fruit, BAM, it is now a healthy cupcake! 

Peach Mango Cupcakes

1 Cup Frozen peaches and Mango's
1 Cup Water
4 Tbsp sugar
1 Pillsbury White cake mix
1/4 Cup flour
3 Eggs
1/3 Cup oil

In a sauce pan, combine the fruit, water and sugar, and heat to a boil over medium heat. Once sugar has dissolved and mixture has come to a boil, remove from heat and allow to cool completely. In large mixing bowl combine the other ingredients and the cooled fruit mixture. Mix thoroughly, then fill cupcake liners a little over 3/4 of the way, the fruit will prevent the cupcakes from rising too high, cook according to instructions on the cake box. Allow cupcakes to cool completely on a cooling rack.

Pomegranate Cream Cheese Frosting

2 8oz. Packages of cream cheese, at room temperature
1/2 Cup Pomegranate juice
5 Cups Powdered sugar

In a large mixing bowl, with a mixer or stand mixer cream the cream cheese over medium speed until the cream cheese is smooth. Then add a little of the Pomegranate juice and 1/2 a cup of powdered sugar, mix thoroughly until both the powdered sugar and the juice have been integrated. Then add a little more of the juice and another 1/2 cup of sugar, mix thoroughly, then scrape the sides. Add more juice, if there is only a little left just add it all, and another 1/2 cup of sugar, again mixing thoroughly. Continue to do this until the mixture is stiff enough that it does not fall off a spoon and is as sweet as you desire. Remember that the heat and humidity in your house will determine the amount of sugar you will have to add. Then you can pipe or spread over your cupcakes. I just use a ziploc bag for my piping, by cutting off a small corner, sometimes I place a tip in, to add some flare. 

*Special Note: In order to cut down on the amount of sugar you have to add you could always reduce your pomegranate juice to a syrup by boiling it over medium high heat until it has reduced to half, or it coats the back of a spoon. I didn't, but next time I will. 

There you have it, a fruit-a-licious cupcake that is good enough to eat for breakfast!! Doubt me? Then try it!

So, what do you think? Sound like something you might try? Have you ever put fruit in a cupcake?

"Devouring worlds, one book and recipe at a time."

Saturday, April 13, 2013

Chocolate Caramel Cupcakes with Vanilla Whipped Cream Frosting


As promised....cupcakes!!! Today I am going to treat you to the recipe for this little number......who doesn't like caramel and chocolate? If you don't, then don't answer that!

Chocolate Cupcakes

Yield: 18 cupcakes
1 Cup Milk chocolate chips
1 Cup Milk + 1 Tbsp. Lemon juice (This will make buttermilk)
1 3/4 Cup Flour
1 tsp. Baking soda
1 Cup Sugar
1/2 tsp. Salt
1/2 tsp. Vanilla
1/4 Cup Vegetable oil
3 Eggs

Heat oven 325 degrees. In a medium sauce pan melt chocolate and milk mixture and heat over medium heat, until the chocolate is completely melted, whisk together. Remove from heat and allow the mixture to cool. In a large mixing bowl combine flour, baking soda, sugar, and salt. In small bowl combine eggs, and oil. Once the chocolate is cool add a little to the flour mixture and combine. Then add the egg mixture and mix thoroughly. Slowly add chocolate into mixture, mixing thoroughly after each addition. Mixture will be a little runny. Fill liners about 3/4 of the way and bake for 20-25 minutes, until cupcakes spring back when touched, or until a toothpick comes out clean when inserted in the middle. Once cupcakes have completely cooled, using a melon baller, remove small portion of cupcake.

Caramel

1/2 Cup Granulated Sugar
2 Tbsp. Butter
1/2 Cup Heavy whipping cream

In medium, heavy sauce pan, heat the sugar over medium heat, until the sugar liquefies. Do not stir, once the sugar turns to liquid swirl the sugar around the pan and cook until the sugar turns a nice amber color. *Warning: this next part can be very dangerous. It is always a good idea to wear oven mitts for the next part. Once the sugar has turned a nice amber color, add in 1 Tbsp. of butter and whisk. Then slowly add in the cream, make sure you lean back from the pan for this, it will be extremely hot! Don't worry, the sugar will solidify, then add the last tablespoon of butter and whisk. Continue to cook, whisking constantly until the sugar has remelted. Remove from heat and allow to cool. Once caramel has cooled completely, spoon caramel into the holes of each cupcake.

Vanilla Whipped Cream Frosting

2 Cups Heavy whipping cream
1/2 Cup Powdered sugar
1 tsp. Vanilla
1 tsp. Cream bouquet emulsion (optional)

Place stainless steel bowl and whisk (beaters) in freezer for 5 minutes. Remove from the freezer and pour in the heavy whipping cream, vanilla and cream bouquet emulsion (if you have it, don't worry if you don't, it can be hard to find), on medium speed whip mixture for about 2 minutes. Then add sugar 1/4 cup at a time. Making sure to whip well after each addition. At this point, taste the mixture, if it is not sweet enough add another 1/4 cup of sugar. Continue to whip mixture until the cream stands up when you remove the beaters. Then place in a large ziploc bag and cut a small corner off, now pipe. If you have any piping tips, then cut a small corner, add the tip, then fill with the frosting. Now pipe those cupcakes and eat up!

These cupcakes are best stored in the fridge because of the whipped cream. 

"Devouring worlds, one book and recipe at a time."

Tuesday, April 9, 2013

Cupcake Mania

Okay, I think it is safe to say I am obsessed with cupcakes. It's okay, you can say it. I can take it. I am obsessed. But that's okay.

I have come to accept my cupcake obsession and turn it into blogging perfection! Like my rhyming there? Yeah, me neither, but oh well, I'm not taking it back now.

Well anyway, back to why I am writing this post. I know that I have been kind of absent from this blog lately, and that has a lot to do with the fact that I have not had a lot of culinary inspiration the last couple of weeks. I know, sad right?

But the good news is, that my culinary inspiration is back!! Can I get a fist bump?! Oh yeah! So what can you expect from me in the upcoming weeks.......cupcakes of course!

First I will give you a recipe for my Chocolate Caramel Cupcakes with Whipped Cream Frosting....Yup that's this lovely little cupcake right here!


I will also give you my recipe for Mango Peach Cupcakes with Pomegranate Cream Cheese Frosting.....that's this one.......


And I plan on creating.......an Apple Pie Cupcake with Caramel Buttercream and a Smores' Cupcake with Marshmallow filling and a Graham Cracker Crust. I haven't figured out the frosting just yet, but you can bet your yumminess that it will be delish! 

Well there you have it, my cupcake obsession! What can I say, when I walk in my kitchen it screams CUPCAKE!!!

Have a good one! And I will catch you on the blogging flip side!

"Devouring worlds, one book and recipe at a time."


Saturday, April 6, 2013

Buttery Mashed Potatoes


As you can see from the picture above, today I am going to give you one of my recipes for mashed potatoes, and as you can also see, my mashed potatoes are not lump free. And I am okay with that! 

I love mashed potatoes, and personally I think they could make a meal all on their own and that they really don't get enough respect! Mashed potatoes are good dang it! So good that we should eat them all the time! Okay well maybe not all the time, but a lot!

Buttery Mashed Potatoes
Yield: 12-15 Servings (depend on size)

12 Yukon golden potatoes, peeled, cubed
1 8oz. Package cream cheese
1 Cup Butter/Margarine
1/2-3/4 Cup Milk
1 Tbsp. Kosher salt

In a large stock pot place cubed potatoes and cover with water, enough to come above the potatoes at least an inch. Pour in the kosher salt, place on medium heat and cook until the potatoes can be smashed with a fork, making sure to stir them from time to time. Once the potatoes are tender remove from heat and drain. Place the potatoes back in the pan and add the cream cheese. Using a hand masher or a hand mixer, smash the potatoes, then add the butter/margarine and continue to smash, ending with 1/2 a cup of milk. Continue to smash the potatoes until they reach the desired creaminess. May need to add more milk. (I personally prefer to mash my potatoes with a hand masher, not only do I get a good work out, but I kind of like the lumps.)

Once they reach your desired consistency, serve up and eat. If you want to really indulge then top with bacon, cheese, and chives for a loaded mashed potato!

I love these potatoes and so do my kids, there are never any leftovers and we always fight over who get's to eat the last of them. So, how do you do your mashed potatoes? Do you like lumps or no lumps?

"Devouring worlds, one book and recipe at a time."

Wednesday, April 3, 2013

Chocolate Peanut Butter Cupcakes with Chocolate Buttercream

I think we have established that I have a small obsession with creating cupcakes! Hello, have you seen my blogs?! Well, I also love peanut butter and chocolate together, so I thought why not combine all three of these loves???? Now I see that look on your face, and I know what you are thinking...."you put peanut butter in a cupcake?" And my answer would be.....Yes, I put peanut butter in a cupcake, and no it did not turn out the way I planned!

So here's what happened on the first attempt.....


Does this look like a chocolate cupcake to you? No, well me either. And the taste.....it tasted like peanut butter! So I guess I scored there, but the peanut butter completely over powered the taste of the chocolate, and since I was kind of going for a CHOCOLATE peanut butter cupcake I decided that I had to make them again! 

And finally I got something that looked like a chocolate cupcake and tasted like a chocolate cupcake, but with a hint of peanut butter! 


Alas! I had done it, and I perfected my chocolate cake recipe while I was at it! Total bonus!!

Chocolate Peanut Butter Cupcakes with Chocolate Buttercream

Yield: 18 cupcakes

Chocolate Peanut Butter Cupcakes
1 Cup Milk chocolate chips
1 Cup Milk + 1 Tbsp. Lemon juice (This will make buttermilk)
1 3/4 Cup Flour
1 tsp. Baking soda
1 Cup Sugar
1/2 tsp. Salt
1/2 tsp. Vanilla
1/4 Cup Vegetable oil
3 Eggs
1/2 Cup Peanut butter

Heat oven 325 degrees. In a medium sauce pan melt chocolate and milk mixture and heat over medium heat, until the chocolate is completely melted, whisk together. Remove from heat and allow the mixture to cool. In a large mixing bowl combine flour, baking soda, sugar, and salt. In small bowl combine eggs, oil and peanut butter. Once the chocolate is cool add a little to the flour mixture and combine. Then add the egg mixture and mix thoroughly. Slowly add chocolate into mixture, mixing thoroughly after each addition. Mixture will be a little runny. Fill liners about 3/4 of the way and bake for 20-25 minutes, until cupcakes spring back when touched, or until a toothpick comes out clean when inserted in the middle.

Chocolate Buttercream
1 Cup Milk chocolate chips
2 Sticks Butter (salted or unsalted)
1 Cup Butter flavor Crisco
1 tsp. Vanilla
3 1/2 Cups Powdered sugar

In medium saucepan, combine chocolate and 1 stick of butter, place over medium heat and melt chocolate; whisk until butter and chocolate combine. Remove from the heat and allow chocolate to cool completely, you don't want your buttercream to melt! In a large bowl, or in your stand mixer cream together Butter Flavor Crisco and the other stick of butter. Add vanilla and 1/2 cup of powdered sugar and mix on medium speed. Add another 1/2 a cup of powdered sugar and mix thoroughly. Once chocolate is cool pour some chocolate into the creamed mixture and mix together. (Make sure you scrap the bowl before you add the next ingredient). Now continue to add 1/2 a cup of powdered sugar and chocolate until both ingredients have been completely used. Mixture should be thick enough to not fall off a spoon and easy enough to pipe. If the mixture is too soft add another 1/2 cup of powdered sugar. If the mixture is too thick, add 1 Tbsp. of water, until the mixture reaches the desired thickness. Keep in mind that the temperature and humidity in your kitchen will effect the amount of powdered sugar needed to reach your desired thickness.


And there you have it.....Peanut Butter in a cupcake! What do you think? Is this something that you would try? Have you tried to put in any unusual ingredients into your cupcakes?

"Devouring worlds, one book and recipe at a time."

Monday, April 1, 2013

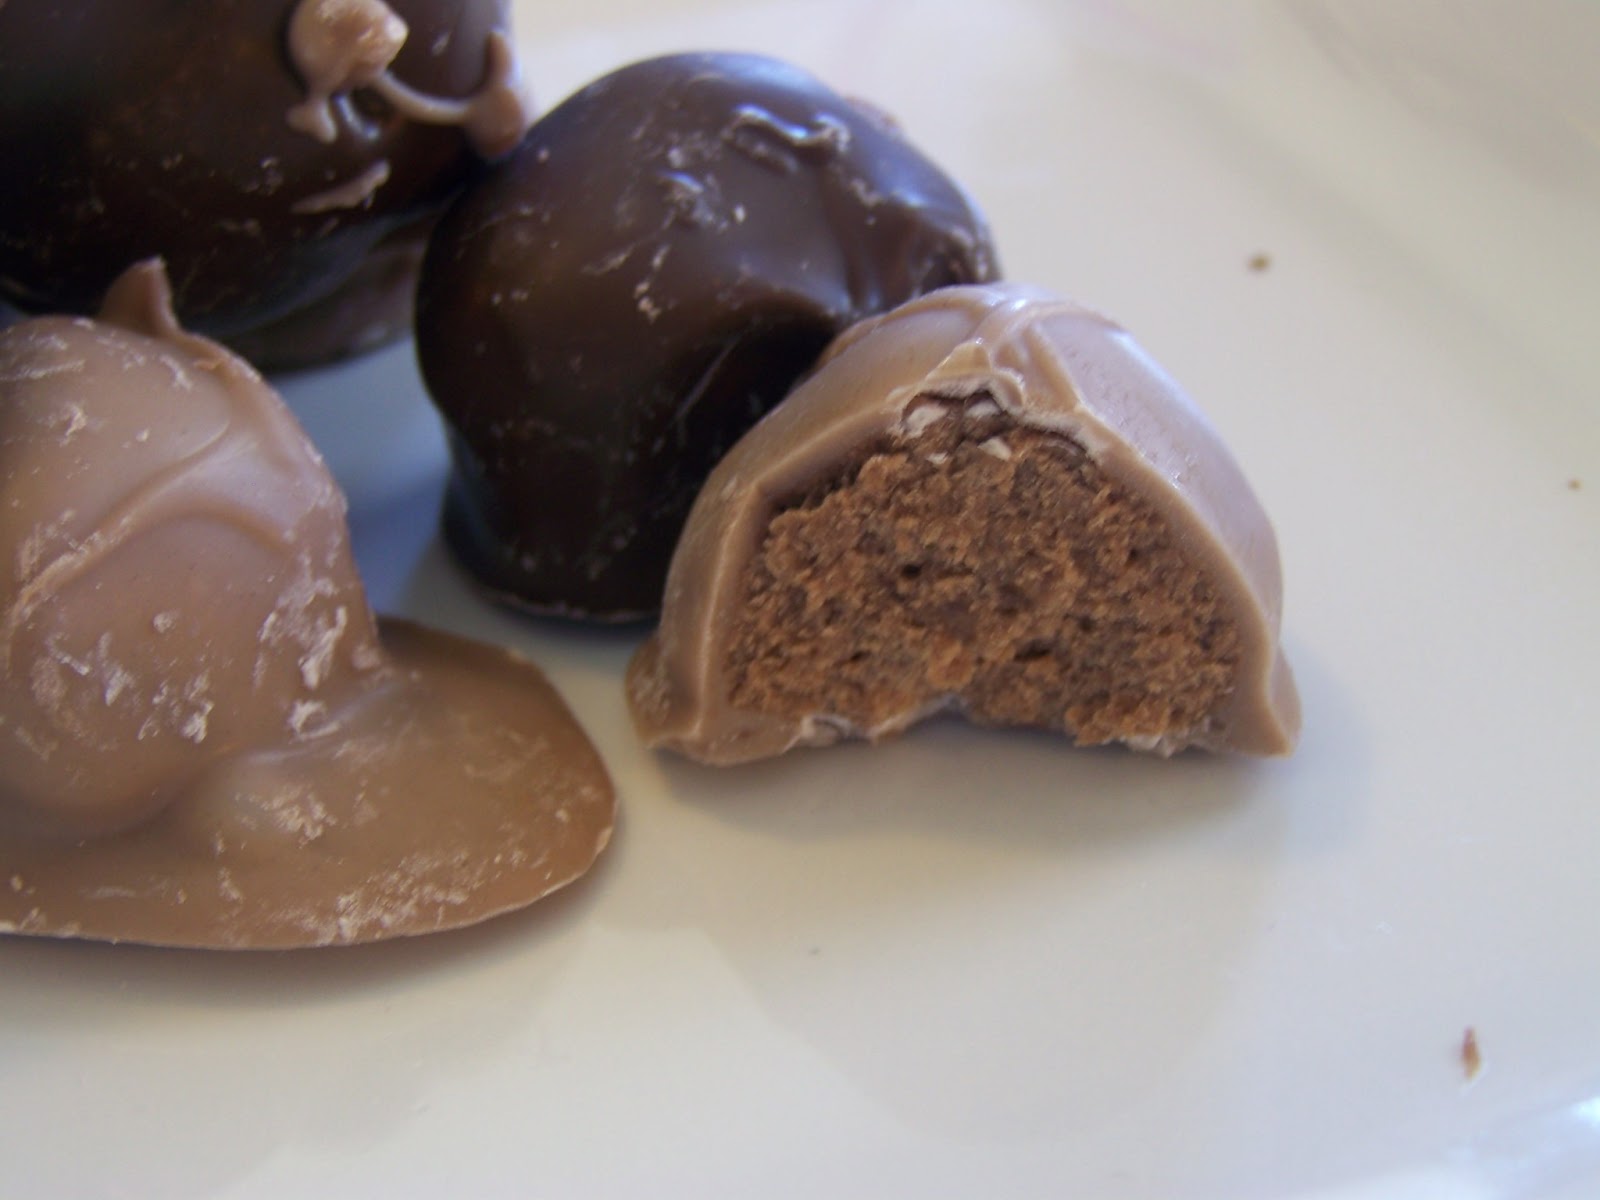
Chocolate Covered Nutella Peanut Butter Balls


I have been making Chocolate covered Peanut Butter Balls since I was old enough to roll a ball with play dough. Peanut Butter Balls have been a great family tradition, one that I gladly pass on to my children. Peanut Butter Balls are so simple and so delicious and I am always looking for ways to change them. With my love of Nutella it only seemed logical to combine the two. And let me tell you, they are totally AWESOME!! I'm not just saying that either, these really are awesome.

Chocolate Covered Nutella Peanut Butter Balls

Yield: ~150-200 

2 Cups Creamy peanut butter
1 26.5 oz. Jar of Nutella
1 Stick of butter melted, OR 1/2 cup butter/margarine
3 1/2 Cups of powdered sugar
1 1lb. 8oz. Package of Almond Bark (Chocolate)

In a large mixing bowl place peanut butter and Nutella and mix thoroughly, then add melted butter and mix again. Once everything is mixed slowly add the powdered sugar, 1/2 a cup at a time, mixing thoroughly after each addition. This will help prevent lumps of powdered sugar. Keep adding powdered sugar until all the powdered sugar has been used or until you can roll the mixture into a ball without it completely sticking to your hands. If the mixture still sticks to your hands, then add more powdered sugar. The humidity and heat in your house will directly impact the amount of powdered sugar needed to form the balls. Once the mixture is ready roll into balls about the size of a quarter. Really you can roll them as big or as little as you want, but a quarter seems to be a good size. Roll the balls and place on a sheet pan (cookie sheet). 

In a microwave safe bowl melt 6 of the Almond Bark squares in the microwave for 1 minute at a time, until the chocolate is completely melted. You do this in 1 minute intervals to make sure that you don't burn or scorch the chocolate. Once the chocolate is melted then roll the Nutella Peanut Butter Balls around in the chocolate until they are completely coated. Place back on the cookie sheet and continue until all the balls are covered. (You will have to melt more chocolate). Once all the balls have been covered place them in the freezer to allow the chocolate to harden. 


Once the chocolate has hardened, remove from the freezer and devour!!! These great little diddies will keep in the fridge for a good month, in the freezer for a good 2 or 3 months and will last at room temperature as long as your house is not hot, for a couple of weeks. But I feel I must warn you, they won't last longer than the first week!!! 

This is my favorite sweet treat, Do you have one? If so, what is it?